Characters & Presets
In AIDeepIn, a conversation is a character: each character has its own persona, linked resources and history. Click a character in the left list to switch; hover an entry for the edit pencil icon.
NOTE
Each account can create up to 50 characters (including copies from presets). At the limit the button shows a message — delete unused characters to free up slots.
Creating a Character
- Click New Character above the list.
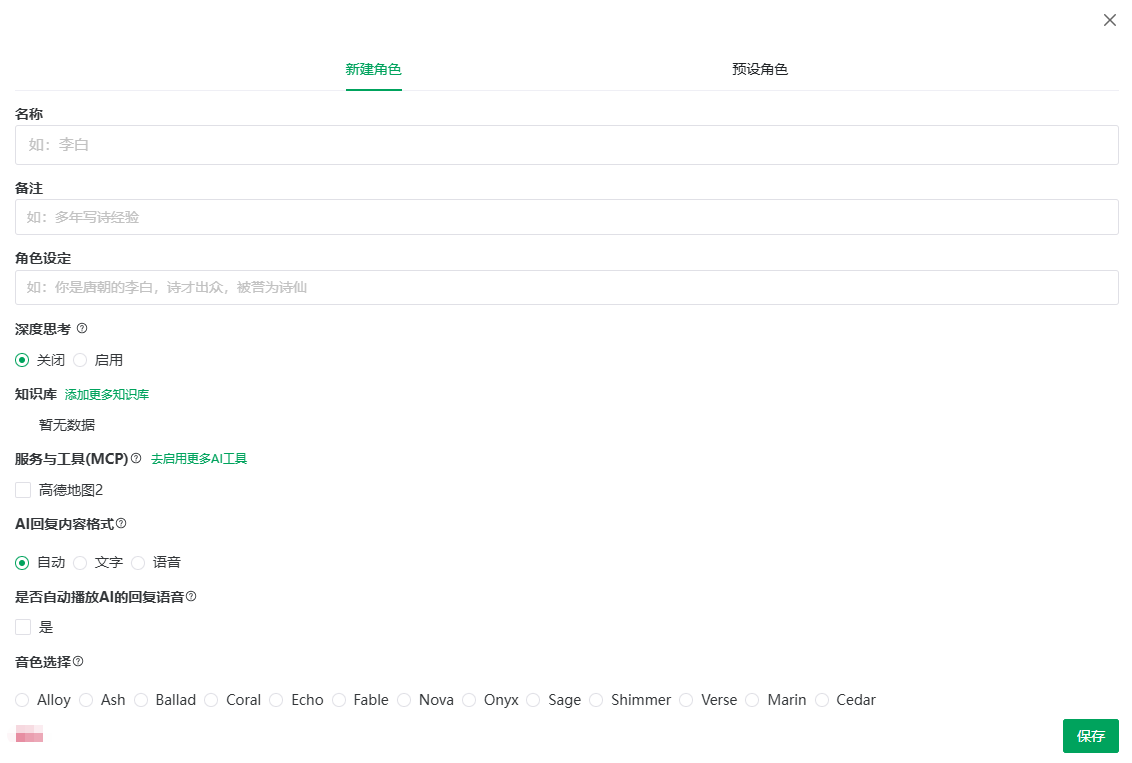
- The dialog has two tabs: New Character and Presets; stay on New Character.
- Fill in the form (field details in Character Settings); at least the name is required.
- Save — the new character appears at the top of the list.
Creating from Presets
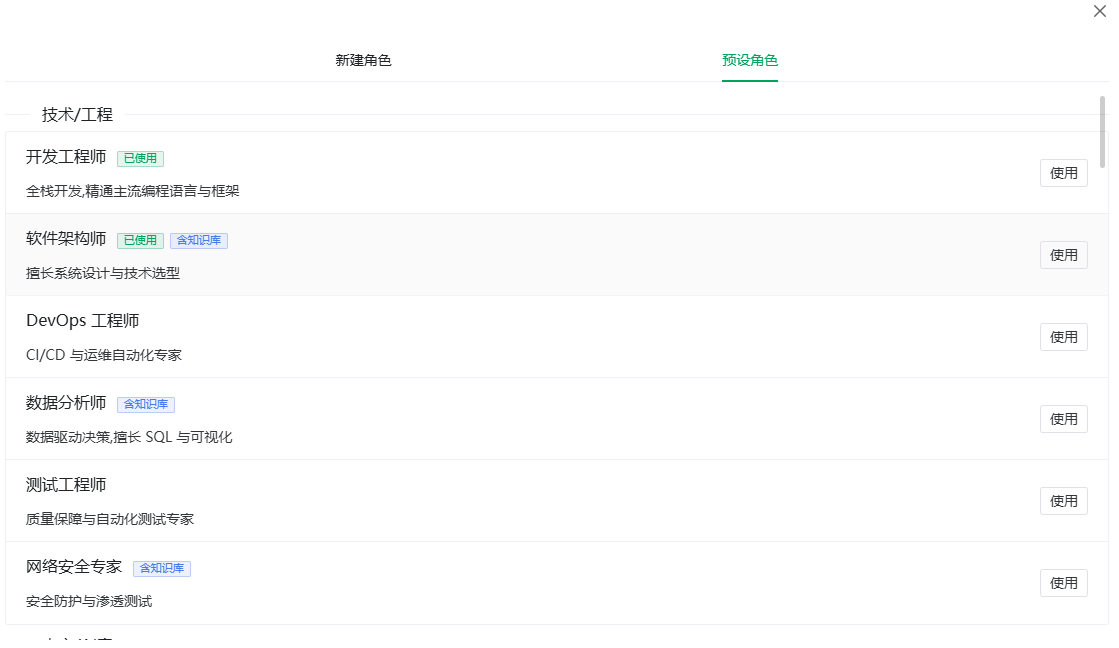
Presets are built-in characters grouped by scenario into 11 categories: Tech/Engineering, Content/Creative, Education/Academic, Business/Management, Professional Services, Design/Image, Marketing, Customer Service, Admin/Office, Reporting Assistant, Others.
- Click New Character and switch to the Presets tab.
- Expand a category and browse the entries.
- Click an entry to view its persona and decide whether it fits.
- Click Use — the preset is copied as your own character ("Created successfully").
- Used presets are marked Used; clicking Use again switches to the character you copied earlier — no duplicate is created.
TIP
Presets tagged with knowledge base automatically create a dedicated same-named knowledge base when copied — you get a ready-to-use domain knowledge base without manual setup.
Editing & Deleting
Edit: hover a list entry and click the pencil icon (or top bar More → Edit), change the form and Save.
Delete: open the edit form, click Delete, confirm "Delete character {name}?".
WARNING
Deleting a character removes all of its conversation history and cannot be undone.
Previous: Chat Window · Next: Character Settings